AI pixel-art sprites to a playable character in Godot or Unity
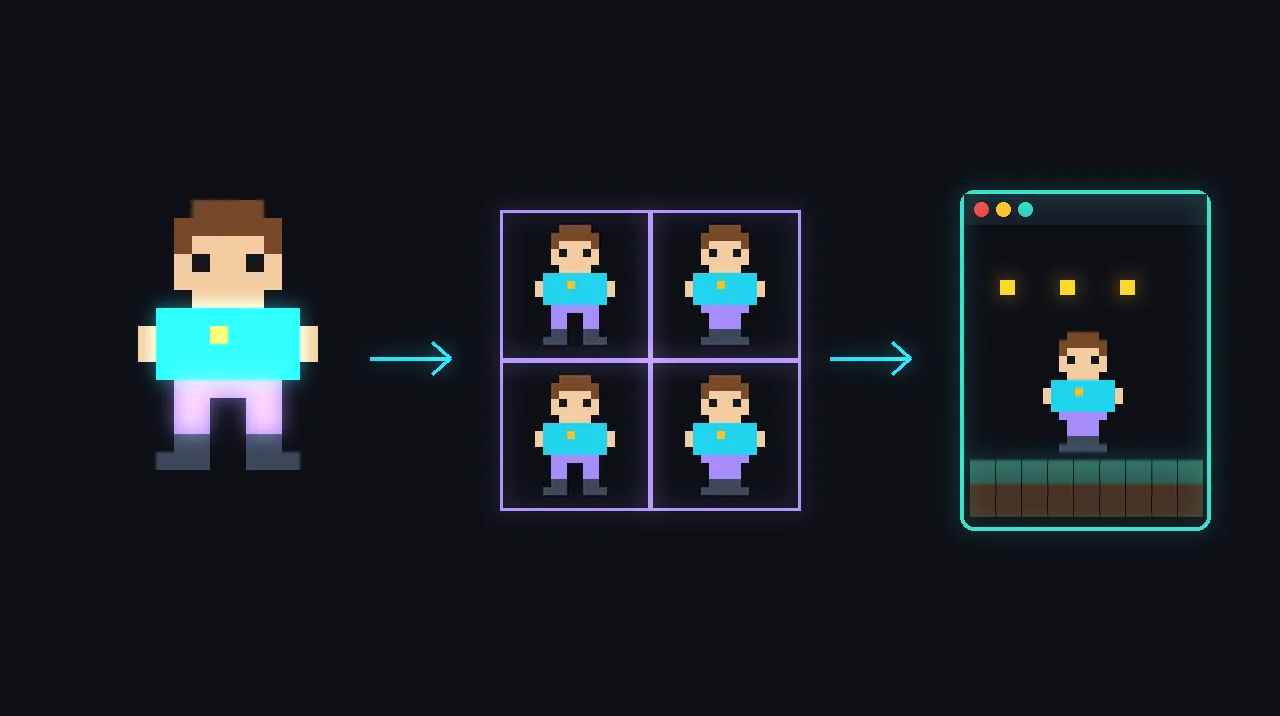
An AI-generated pixel-art character with its directions and animations, imported into Godot or Unity as a crisp, unblurred sprite that plays its walk cycle in your game.

 Generate character
- Animate + export sheet
- 3Crisp import settings
- 4Slice frames
- 5Play in engine
Cost and licences of the AI tools in this guide
- PixelLabCommercial use allowedFree trial tier, no credit card pricing
- Retro DiffusionCommercial use allowedFree starting balance for new accounts pricing
Everyone: steps 1–4
Check what your plan lets you ship
- PixelLab's pricing page lists commercial use on every plan, including the free tier: you own your generations, with one exception, you can't use them to train models.
- Retro Diffusion's FAQ says everything you generate is yours, for personal and commercial projects.
- If you sell on Steam, note which sprites you generated: Steam's Content Survey asks about AI-generated content that ships in the game.
You should see: You know you can sell a game with these sprites, and what you've agreed not to do with them.
Watch out: "You own it" under a tool's terms is a contract with the vendor, not a copyright guarantee. Keep the terms page's date with your project files.
From the official docs: PixelLab: pricing and licence ↗
Generate the character and its walk cycles
- Open PixelLab's Characters page and describe your character in a text prompt.
- Choose 4 or 8 directional views.
- Add walk, run, idle or other animations with one click, and check each in the built-in preview.
- Export each animation as a sprite sheet (one image) or as individual frames.
You should see: A sprite sheet or a set of frame images for each animation, in every direction you chose.
Watch out: Keep every frame of a character at the same pixel size. Both engines below cut a sheet into equal cells, so mixed sizes slice wrongly.
From the official docs: PixelLab: ways to use PixelLab ↗
Add custom moves with Animate with Text
- Give the tool a reference sprite (required) and type the action, such as attack, jump or idle.
- Pick a frame count from 4 to 16 (even numbers only).
- Turn on Remove Background if you want a transparent result.
You should see: A new animation whose first frame is exactly your original sprite.
Watch out: Cost grows with sprite size and frame count, and larger sprites allow fewer frames. PixelLab shows the exact cost before you generate.
Official video from PixelLab. Watch on YouTube ↗ From the official docs: PixelLab: Animate with Text ↗
Or use Retro Diffusion's animation styles
- To animate a sprite you already have, use one of Retro Diffusion's advanced animation styles (walking, idle, jump, crouch, attack, destroy or a custom action), sized 32 to 256 px to match your start frame.
- Animations come back as a GIF by default; through the API, set return_spritesheet to get a PNG sprite sheet instead.
- For the other directions of an existing sprite, the rotate style returns 7 more views, or a 3x3 PNG sheet with return_spritesheet.
You should see: A PNG sprite sheet you can slice in your engine, with a transparent background if your start frame was transparent.
Watch out: Rotation frames step 45 degrees counter-clockwise from the down-right diagonal, so frames 2, 4, 6 and 8 are front, left, back and right.
From the official docs: Retro Diffusion API reference (llms.txt) ↗
Then pick your path
Godot
Stop Godot smoothing your sprites
- Open Project > Project Settings and go to Rendering > Textures > Canvas Textures (turn on Advanced Settings if you don't see it).
- Set Default Texture Filter to Nearest. In 2D, this project setting is the default filter for every CanvasItem.
- Select your sprite sheet in the FileSystem dock and keep Compress > Mode on Lossless in the Import dock, the mode Godot's docs recommend for pixel art.
You should see: Zoomed-in sprites show hard, square pixels instead of a blur.
Watch out: If Godot detects a texture being used in 3D it switches it to VRAM compression, which hurts pixel art. Set Compress > Mode back to Lossless.
From the official docs: Godot docs: importing images ↗
Scale the game window in whole steps
- In Project Settings > Display > Window, set the viewport width and height to your game's pixel resolution. Godot's docs suggest 640×360 as a good baseline.
- Set Stretch > Mode to viewport and Stretch > Aspect to keep (or expand to support more aspect ratios).
- Set Stretch > Scale Mode to integer.
You should see: The game scales to 2x, 3x and so on, with black bars where the window doesn't fit an exact multiple.
Watch out: Fractional scaling makes some pixels wider than others. Integer scale mode is what stops that.
From the official docs: Godot docs: multiple resolutions ↗
Build the animation with AnimatedSprite2D
- Add an AnimatedSprite2D under your character's CharacterBody2D, then set its SpriteFrames property to New SpriteFrames.
- In the SpriteFrames panel, click Add frames from a Sprite Sheet, choose your PNG, and set the horizontal and vertical frame counts to match the sheet.
- Select the frames for one animation, click Add frames, and rename the animation (for example walk_down).
- Raise Speed (FPS) if it plays too slowly, then call $AnimatedSprite2D.play("walk_down") from your script.
You should see: The walk cycle plays in the SpriteFrames preview and when you run the scene.
Watch out: If you exported individual frames instead of a sheet, drag the frame files straight into the SpriteFrames panel.
From the official docs: Godot docs: 2D sprite animation ↗
Optional: let a coding agent do it over MCP
- PixelLab runs an MCP server that coding assistants such as Claude Code can call; you add it with your PixelLab API token.
- Its tools include create_character (4 or 8 directions) and animate_character, so the agent can generate sprites and write the Godot code that uses them.
- PixelLab notes that Claude can run Godot headless and handles GDScript well.
You should see: The agent returns generated characters and animations it can drop into your project.
Watch out: Map objects made through the MCP server are deleted after 8 hours, so save anything you want to keep.
Official video from PixelLab. Watch on YouTube ↗ From the official docs: PixelLab: MCP (vibe coding) ↗
Unity
Import the sheet as pixel-art sprites
- Select the sprite sheet in the Project window and set Texture Type to Sprite (2D and UI) and Sprite Mode to Multiple.
- Give all your sprites the same Pixels Per Unit value.
- In the Advanced section, set Filter Mode to Point (no filter), set Compression to None, then click Apply.
You should see: Sprites look blocky, not blurry, when you zoom in the Scene view.
Watch out: Leave Filter Mode on Bilinear or Trilinear and the pixels blur when the sprite is scaled.
From the official docs: Unity Manual: add a pixel perfect camera ↗
Slice the sheet in the Sprite Editor
- Click Open Sprite Editor, then open the Slice dropdown in the toolbar.
- Set Type to Grid By Cell Size and enter one frame's width and height as Pixel Size (or use Grid By Cell Count with the sheet's rows and columns).
- Click Slice, check the outlines, then click Apply.
You should see: Red outlines preview the cuts, and after Apply each frame appears as its own sprite under the texture in the Project window.
Watch out: Unity may not draw the preview outlines on a texture you've already sliced. Adjust single frames by dragging their blue handles.
From the official docs: Unity Manual: cut out sprites from a texture ↗
Make the animation clip
- Select the GameObject with your Sprite Renderer and open Window > Animation > Animation.
- Create a clip, then select the frames for one animation in the Project window and drag them onto the Animation window.
- In the Animation window's More menu, turn on Show sample rate and lower Samples until the cycle plays at the speed you want.
You should see: Pressing Play in the Animation window runs the walk cycle in the Scene view.
Watch out: Samples defaults to 60, so each frame shows for only a sixtieth of a second. Unity's own tutorial uses 4 for its four-frame walk.
From the official docs: Unity Learn: create 2D sprite animations ↗
Add a Pixel Perfect Camera (URP)
- Select the main camera, click Add Component and add Pixel Perfect Camera.
- Set Assets Pixels Per Unit to the same value as your sprites' Pixels Per Unit.
- Set Reference Resolution to your game's pixel resolution, for example 320 × 180.
- In the Scene view's Grid and Snap overlay, set Grid Size to 1 divided by that Pixels Per Unit and turn on grid snapping.
You should see: A dotted green outline of the reference resolution and a solid green outline of what the Game view shows.
Watch out: In URP the Pixel Perfect Camera is built in (the Universal 2D template includes it). Don't install the separate 2D Pixel Perfect package: it only works with the Built-In Render Pipeline.
From the official docs: Unity Manual: add a pixel perfect camera ↗
Questions
Can I sell a game that uses PixelLab sprites?
PixelLab's pricing page says you can use generations commercially in your games and other projects, and that you own the rights to them, except that you can't use them to train models. Commercial use is listed on the free tier as well as the paid plans. source
Does PixelLab train its models on my sprites?
PixelLab's FAQ says it does not use user inputs or generated content to train its models. source
Why does my pixel art look blurry in Godot?
Usually the texture filter. Set Project Settings > Rendering > Textures > Canvas Textures > Default Texture Filter to Nearest (it reads only the nearest pixel), keep the sprite's Compress > Mode on Lossless, and use integer stretch scaling so pixels stay even. source
Why does my pixel art look blurry in Unity?
Set the sprite texture's Filter Mode to Point (no filter) and Compression to None, keep Pixels Per Unit the same on every sprite, and add a Pixel Perfect Camera in URP. source
Written from the official documentation linked on each step and checked . Menus and settings change between versions, so follow the linked docs if something looks different. No vendor reviews or pays for these guides.